Whelping Box Construction
Submitted by Helayne Silver and designed by Carl Jeser
(Please click on any of the photos in order to view a larger picture)
We decided to build a whelping box that could be disassembled for storage. This caused me to construct the box somewhat differently then I would have if the box were not going to have to be disassembled. I was concerned about the structural integrity of the box and kept this in mind throughout the design and construction of the box. I tend to overbuild so you may not find it necessary to use as many screws as I did.
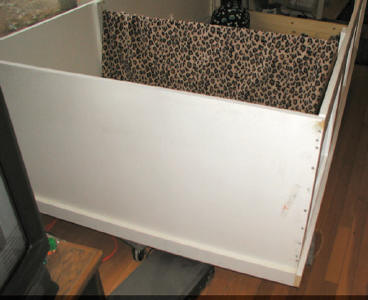
We chose to use melamine for the bottom and sides of the box. This material can be purchased at Home Depot or Lowes in 4´ by 8´ sheets as well as other sizes. This material has a plastic type surface that will not absorb liquids and can easily be cleaned. The cost per 4´ by 8´ sheet is approximately $25. The biggest disadvantage to the use of this material is its weight. It is heavier then equivalent size plywood. Its core is pressed wood and must be sealed if there is any potential contact with moisture. I chose to seal all raw edges with a coat of oil based primer and then a coat of latex primer and then a coat of exterior latex. This sealed the edges from moisture and made them very smooth to the touch. The flat, plastic coated, surfaces should not be painted, only the edges. The edges must be sanded smooth because after being cut the plastic surface at the edge can be very sharp and can easily cut flesh. You should be careful handling raw, unsanded edges. Once sanded and painted the edges offer no danger to you or your dogs. The three coats of paint applied to the edges results in a very smooth surface. It is also possible to apply a banding strip to the edge. It is also sold at home depot and has a heat activated adhesive on it. You can use an iron or a heat gun to apply the edge. I just felt it was easier to use the paint and that the use of the paint resulted in a satisfactory and safe edge. I also considered cutting slits in 1 ¼” diameter PVC and placing the PVC over the upper exposed edges of the sides. I will probably put the PVC over the top edges of the sides the next time we use the whelping box.
The bottom of the box is made of one sheet of 4´ by 8´ melamine. The sides of the box were made of 2´ by 8´ sheets of melamine. I purchased the sheets at Home Depot and had them cut a 4´ by 8´ sheet in half. Melamine sheets are usually 49″ by 99″ so be sure you or the person cutting the board measures to find the center of the sheet and does not assume the sheet is 48″ wide or you may wind up with the sides being different heights. You can cut the melamine sheets with a circular saw, a jig saw, or a hand saw. You may get some chipping of the plastic surface but it should be minor and you should be able to smooth the edge by sanding and if you paint the edges the chips will not be noticeable.
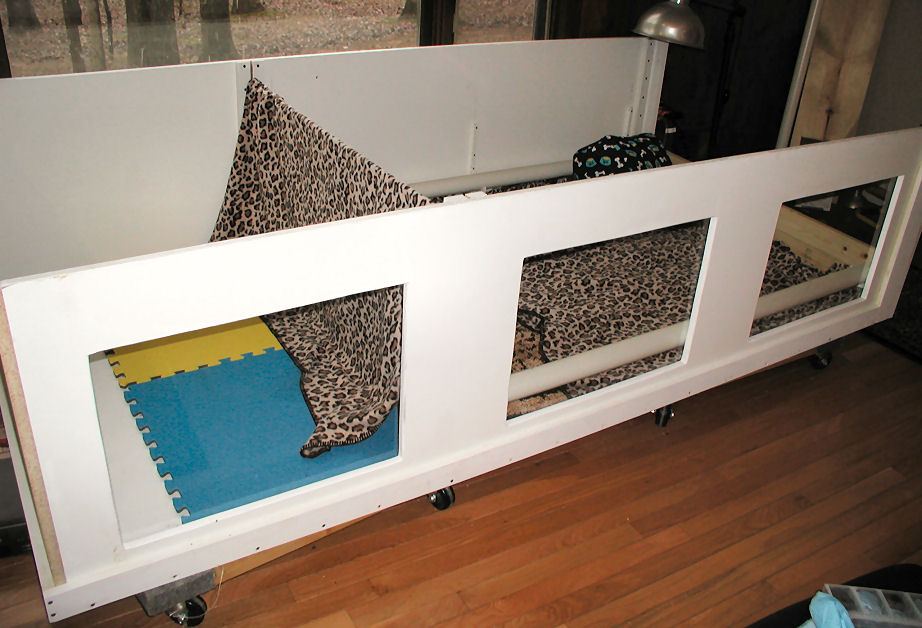
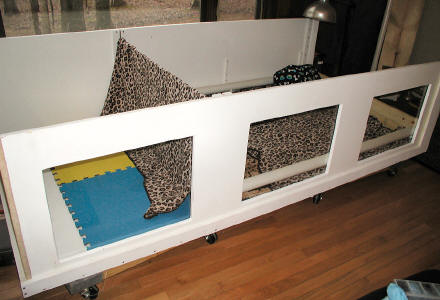
The windows were made by cutting out openings in the side pieces before the box was constructed. All of the cut edges were sanded, primed and painted. We chose to use 18″ by 24″ sheets of plastic. Home Depot and Lowes both sell this size sheet of plastic as well as several other sizes. I cut the window openings 2″ smaller then the sheet of plastic so that the plastic would overlap the openings by 1″ on sides and top and bottom. I drilled holes in the plastic about every 6″ around the perimeter of the plastic and mounted it to the sides using #4 round head screws 5/8″ long. I drilled the holes about ½” in from the outer edge of the plastic. I used the cheapest plastic sheets and once mounted it seems strong and there is little or no flex. I had debated about buying lexan but decided to try the less expensive material and it seems to be fine.
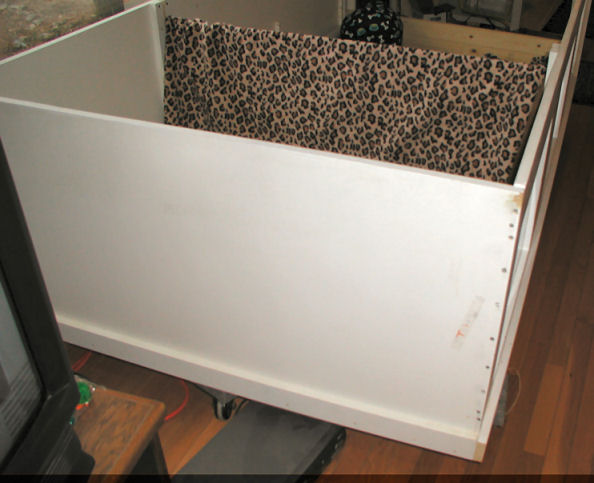
I decided that it would be best to have the sides sit on top of the bottom. I used 1 5/8″ drywall screws to mount the two long sides to the rear wall. I was very careful to drill pilot holes that were as close to the center of the edge of the rear wall as I could. You can feel the screw raise the surface of the bottom sheet as you are screwing in the screw if you are too close to the surface of the plastic film. This just means you are not in the center of the edge. If you feel this rise stop immediately and hopefully you will not break the plastic surface of the melamine. I placed screws at about 6″ intervals. After screwing the long sides to the rear wall I screwed a 1″ x 3″ board along the lower edge of the side and screwed through this board and into the edge of the bottom sheet of melamine. I was very careful to not penetrate the upper or lower surface of the melamine bottom. Again, this was done by feeling the surfaces as I screwed the screws in. I started out using a powered screw gun but this drove the screw in faster then I was able to feel the rise in the surface and I penetrated the melamine surface so I wound up screwing in the screws by hand so that I was able to feel the rise in the melamine surface before the screw penetrated the surface. I then went inside the box and approximately 1″ above the bottom of the box I used 1 1/4″ drywall screws to screw the side to the exterior 1″ by 3″. This length screw did not penetrate the exterior trim board. By using this method to attach the sides I achieved sufficient strength in the box that enabled me to avoid any bracing on the top of the box.
At the front opening of the box I used 1″ by 2″ trim boards at the front sides of the box and then 1″ by 3″ trim boards on the front of the box to provide strength to the box and to provide a slot for the front board to slide up and down in. The combination of the drywall screws and the various trim boards the box seems to have sufficient strength without any additional bracing.

Because we wanted to be able to move the box around we mounted the box on dollies. We support the ends of the box and also the middle of the box. Without support in the middle of the bottom, the box will bend. I had the dollies available so it was easier for me to choose to use them rather then to figure out some other solution. If you had no need to move the box, it could certainly be set directly on the floor.
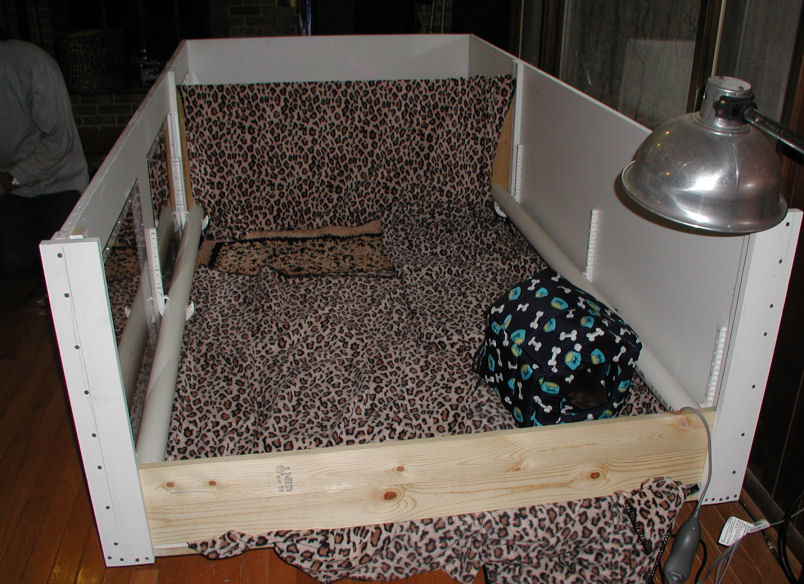
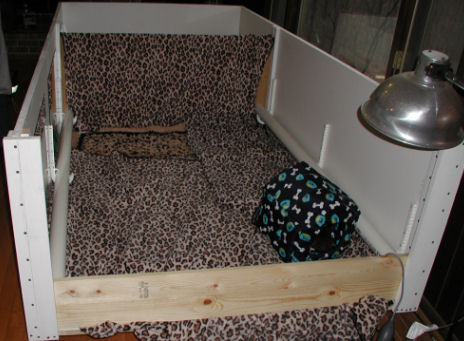
We divided the interior of the box into two areas. The rear of the box is 32 inches deep with a divider and the front of the box is 64″ long. The divider was made of ¼” plywood to make it light weight and easily removable for cleaning or whatever. The guides for the divider were made of 1″ by 2″ boards mounted vertically about ¼” apart. For the divider and the front boards we found it was easier to get the boards in and out if the runners were not tight against the divider. Even when the mother rolled against the divider
it did not pop out of the runners. The front boards are standard 1″ by lumber cut to the length equal to the front opening.
The “pig” rails are made of 2″ diameter PVC cut to fit the front of the box. PVC hangers are used to hang the PVC around the box. The PVC and the hangers are available in the plumbing department of Home Depot or Lowes. The hangers are screwed to the wall at the height best for your bitch; probably 6 to 9 inches above the bottom of the box.

The PVC can be snapped in and out of the hangers so it makes it convenient for cleaning and moving things around in the box. The rails are only in the front portion of the box and not in the rear compartment since the mother can not get into the rear compartment.
The dimensions of the box are as follows:
-
Bottom of box – 49″ by 97″
-
Two long sides of box – 24 ½” by 96″
-
Rear side – 24 ½” by 49″
-
Divider – 22″ by 47 ¼”
-
Window openings – 16″ by 22″
-
Boards for front opening – 47 ¼” long
(We used 1″ by 4″, 1″ by 6″, and 1″ by 12″ boards cut to 47 ¼” long and stacked them as needed to establish the desired height to prevent the mother from leaving the whelping box)
After reading what I have written, I must say this whelping box is easy to build. I think it was easier to build then to explain how to build it. Drilling the pilot holes into the edges and screwing in the screws is the most difficult part just because you have to be so careful when performing these two tasks.